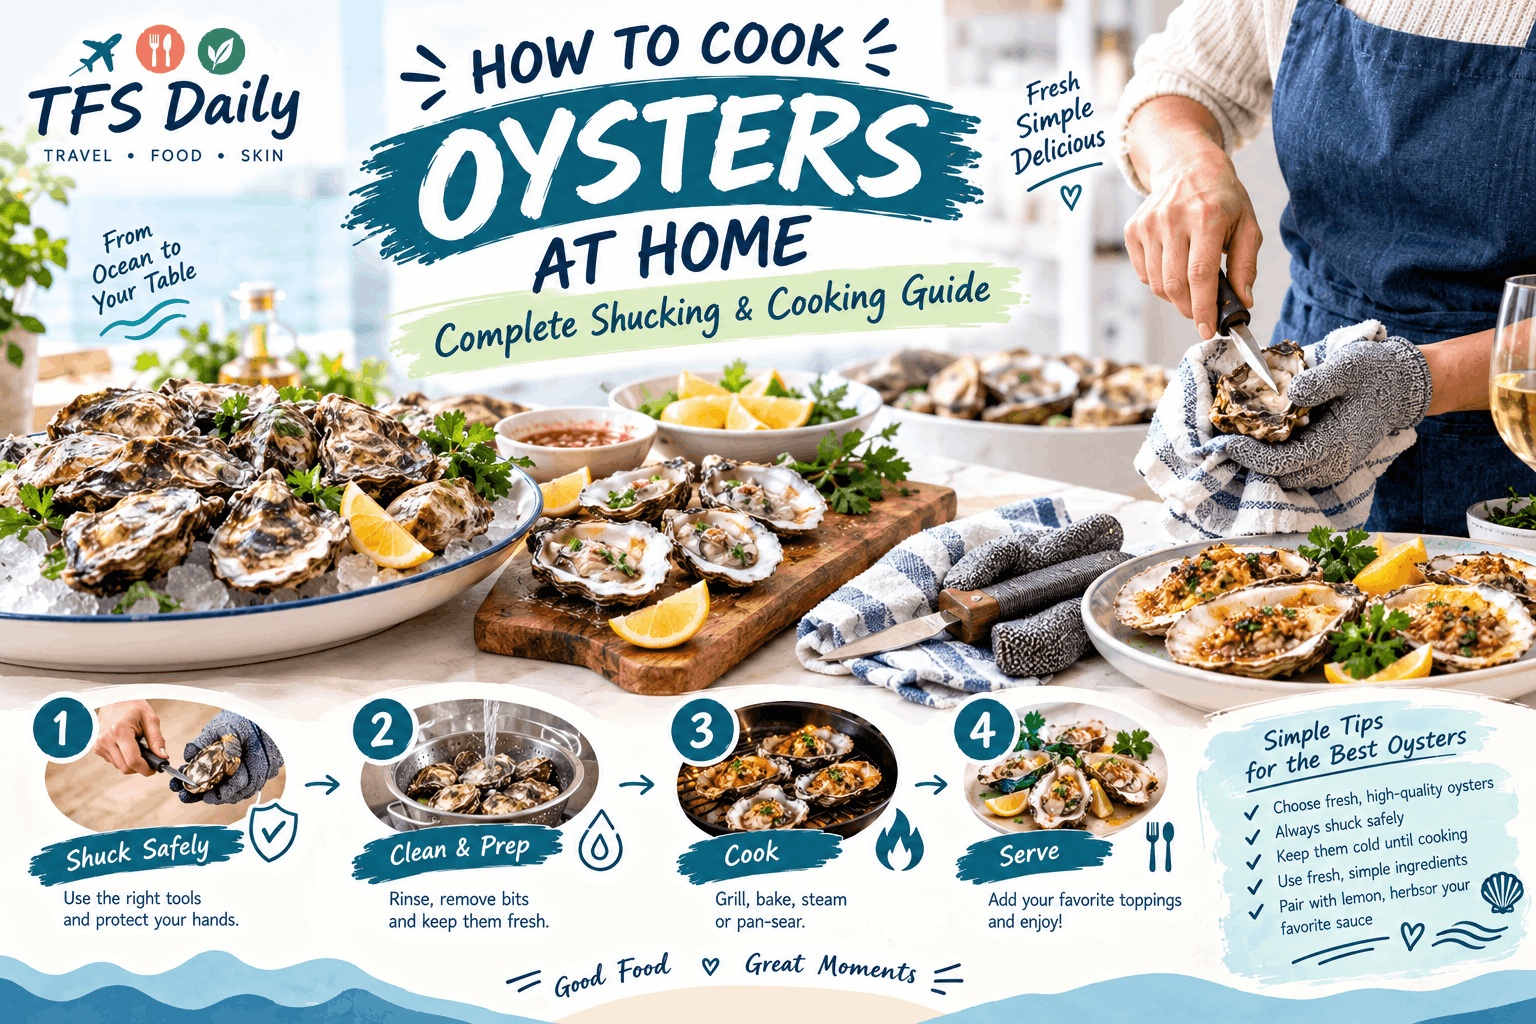
Oysters have long been a symbol of coastal indulgence, yet many home cooks shy away because the process seems intimidating. This guide demystifies every stage—choosing sustainable shells, safely shucking them, cooking a variety of styles, and serving like a pro. By the end, you’ll have the confidence to turn a simple seafood purchase into a memorable meal.
Why Cook Oysters at Home?
Fresh shellfish delivers a burst of briny flavor that restaurant‑grade oysters often can’t match. The health benefits are notable: oysters are low in calories, high in protein, and packed with zinc, vitamin B12, and omega‑3 fatty acids that support immune function and heart health. When you buy directly from a reputable fish market, the price per dozen can be half—or less—than a typical restaurant plate, especially during peak season. Moreover, you control sourcing, opting for farms that follow NOAA or MSC sustainable harvesting standards, which helps protect wild populations and marine ecosystems.
Choosing Fresh, Sustainable Oysters
Identifying Reputable Suppliers
Look for seafood markets that display harvest dates, have a visible refrigeration system, and employ knowledgeable staff. Farmers’ markets and dedicated oyster farms often provide traceability, allowing you to ask about water quality and the exact region of origin.
Key Freshness Indicators
- Shell closure: Closed shells indicate a live oyster; open shells that do not close when tapped are likely dead.
- Clean, dry shells: Avoid shells with slime, excessive barnacle growth, or a strong “off” odor.
- Odor: Fresh oysters smell like the ocean—briny and slightly sweet—not fishy or sour.
Understanding Oyster Varieties
Different regions produce distinct textures and flavors. Kumamoto oysters are small, sweet, and buttery, perfect for raw presentations. Pacific oysters (Crassostrea gigas) offer a crisp, clean finish, while Atlantic oysters (Crassostrea virginica) are larger with a robust mineral note. Selecting a variety that matches your intended recipe can elevate the final dish.
Sustainable Harvesting Standards
When a supplier carries the MSC (Marine Stewardship Council) label or follows NOAA guidelines, you can be confident the oysters are harvested responsibly. Sustainable farms often rotate beds, monitor water quality, and avoid over‑stocking, which reduces disease risk and preserves habitat.
Essential Tools for Safe Shucking
Oyster Knife Selection and Grip
A sturdy, short-bladed oyster knife with a comfortable, non‑slip handle is essential. The blade should be about 2–3 inches long, thick enough to pry the hinge without bending. Hold the knife with a thumb on the back of the handle and the index finger wrapped around the shank for precise control.
Protective Glove or Towel Technique
Wear a cut‑resistant glove on the hand that holds the oyster, or wrap a thick kitchen towel around the shell for added protection. This prevents accidental slips that could nick fingers.
Cleaning and Sanitizing Workspace
Start with a clean cutting board, rinse shells under cold water, and sanitize the area with a food‑safe disinfectant. A sanitized workspace reduces the risk of bacterial contamination, especially when you plan to serve oysters raw.
Step‑by‑Step Shucking Process
Inspecting and Rinsing Shells
Discard any shells that remain open after a gentle tap. Rinse each oyster under cold running water, scrubbing the outer shell with a brush to remove grit.
Positioning the Knife and Prying the Hinge
- Place the oyster cupped‑side up on a stable surface, hinge facing you.
- Insert the tip of the knife into the small gap at the hinge, applying gentle pressure until you feel a click.
- Twist the knife slightly to pop the hinge open.
Separating the Top Shell Without Damaging Meat
Slide the knife along the top shell, cutting the adductor muscle that holds the shells together. Keep the blade flat to avoid puncturing the delicate meat.
Removing the Oyster Meat and Liquid (Liquor)
Lift the top shell and use the knife to detach the oyster from the bottom shell. Preserve the natural liquor—it adds flavor to cooked dishes and is essential for raw presentations.
Cooking Methods Explained
Raw on the Half Shell: Serving Tips and Safety
Serve chilled on a bed of crushed ice. Accompany with classic mignonette (red wine vinegar, shallots, pepper) or a dash of hot sauce. Ensure the oysters were harvested less than 24 hours ago and kept at ≤ 4 °C to minimize bacterial risk.
Baked Oysters: Classic Rockefeller and Cheese‑Free Variations
Preheat the oven to 425°F (220°C). Top each oyster with a spoonful of butter, breadcrumbs, parsley, and a pinch of Parmesan for a traditional Rockefeller. For a dairy‑free option, replace cheese with toasted panko and a drizzle of olive oil. Bake 5–7 minutes until the topping is golden and the liquor is bubbling.
Grilled Oysters: Garlic‑Butter, Herb, and Timing Guidelines
Heat a grill to medium‑high. Place oysters cupped‑side down, brush with melted garlic‑butter, and grill 3–4 minutes—just until the edges start to curl. Finish with a squeeze of lemon and a sprinkle of fresh herbs.
Fried Oysters: Batter, Oil Temperature, Crispness Tips
Prepare a light batter of flour, cornmeal, cold sparkling water, and a pinch of salt. Heat oil to 350°F (175°C). Dip oysters, coat evenly, and fry 2–3 minutes until crisp. Drain on paper towels and serve with a remoulade sauce.
Steamed / Broth‑Based Oyster Dishes
Steam oysters in a pot of aromatic broth (ginger, scallions, soy sauce) for 2–3 minutes. The gentle heat opens the shells and infuses the liquor with umami, perfect for Asian‑style soups.
Three Foolproof Oyster Recipes
Baked Oysters with Parmesan & Herbs
- Preheat oven to 425°F (220°C).
- Place shucked oysters on a baking sheet, drizzle each with ½ tsp melted butter.
- Mix 2 tbsp breadcrumbs, 1 tbsp grated Parmesan, 1 tsp chopped parsley, and a pinch of pepper.
- Spoon mixture onto each oyster, bake 5–7 minutes until golden.
- Garnish with a lemon wedge and serve immediately.
Grilled Oysters with Garlic‑Butter & Lemon
- Combine ¼ cup softened butter, 2 minced garlic cloves, and 1 tsp lemon zest.
- Heat grill to medium‑high, place oysters cupped‑side down.
- Brush each with garlic‑butter, grill 3–4 minutes.
- Finish with a drizzle of fresh lemon juice and a sprinkle of chopped chives.
Quick Oyster Chowder with Cream & Corn
- Sauté ½ cup diced onion, 1 diced celery stalk, and 1 minced garlic clove in 2 tbsp butter until translucent.
- Add 2 cups chicken broth, 1 cup fresh corn kernels, and bring to a simmer.
- Stir in ½ cup heavy cream, then gently add 12 shucked oysters with their liquor.
- Cook 5 minutes, season with salt, pepper, and a pinch of smoked paprika.
- Serve hot, garnished with chopped parsley.
Serving, Pairing & Presentation
Pair raw or lightly cooked oysters with crisp, high‑acid wines. Champagne or a dry Sauvignon Blanc accentuates brininess, while an Oaxacan mezcal cocktail adds smoky contrast for grilled varieties. Classic accompaniments include mignonette, hot sauce, and fresh herbs like dill or cilantro.
For casual gatherings, serve oysters on a slab of crushed ice with small ramekins of sauces. For upscale settings, arrange half‑shells on a marble platter, drizzle with a citrus‑herb vinaigrette, and garnish with edible flowers for visual impact.
Storing Leftover Oysters Safely
- Refrigeration limits: Keep shucked oysters in a sealed container, covered with their liquor, for 24–48 hours. Discard if they develop an off odor or become slimy.
- Freezing cooked dishes: Baked or grilled oysters can be frozen in airtight bags for up to 2 months. Thaw slowly in the refrigerator before reheating.
- When to discard: Any oyster that opens after cooking and does not close when tapped should be thrown away, as it may indicate bacterial growth.
FAQs and Troubleshooting
What are common shucking mistakes and how can I fix them?
Most beginners either break the top shell or damage the meat. Use a firm but controlled twist at the hinge, and keep the knife blade flat against the shell. If the meat cracks, gently scrape it out with the knife’s tip.
Why do some oysters taste metallic?
A metallic flavor often signals that the oyster is past its prime or has been stored at too high a temperature. Choose oysters with a clean, sea‑like aroma and consume them promptly.
How do I adjust cooking time for different oyster sizes?
Smaller oysters (Kumamoto) need less heat—typically 2–3 minutes for grilling—while larger Atlantic oysters may require 4–5 minutes. Watch for the liquor to bubble and the edges of the meat to firm slightly.
Conclusion & Next Steps
Cooking oysters at home is a rewarding skill that blends culinary technique with sustainable seafood appreciation. Experiment with regional varieties, try new flavor pairings, and don’t be afraid to serve them raw for the purest taste. For more seasonal seafood guides, discover how AI can inspire your next menu and stay ahead of rising food costs with budget‑friendly tips. Subscribe to TFS Daily for weekly updates on fresh catches, cooking hacks, and exclusive recipes.